- Create a page template
- Blade template engine
- Template activation in the theme
- Post and archive templates
- I don’t want to use the blade template engine
- Create template parts
Remember not to edit or add files to the main theme. Any changes to the main theme will be overwritten and lost when the theme is updated. The new page template and any modifications should be made in the astratic-child theme.
1. Create a page template
In the child-theme directory (astratic-child/resources/views), there is a file with an example template – page-template-example.blade.php, which you can use to create your templates.
Remember to rename the file and the name of the template inside it.
The appropriate .blade.php template file extension is also important
2. Blade template engine
PHP is perfectly suited for creating templates, but has some limitations. Instructions of the type
<?php echo $variable; ?>every second line of HTML code doesn’t look very legible.
Blade template engine supports working with templates, among others, by adding an elegant way to display variables, facilitating inheritance of layouts and simple directives forif, for, foreach,etc.
Blade files use the .blade.php extension and are located in theresources / viewsdirectory.
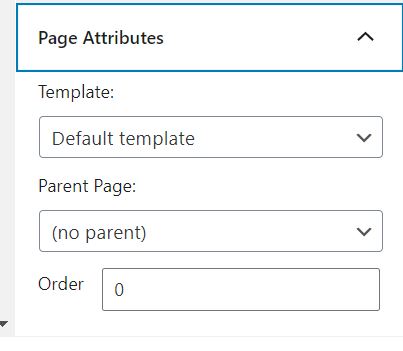
3. Template activation in the theme
By adding a special comment at the beginning of the template code, the template will be available for selection in the list under the given name.
{{--
  Template Name: Default template
--}}
3. Post and archive templates
If you create templates for a given entry type, an archive, the process is the same as creating a page template file. The theme respects the WordPress template hierarchy, so to assign a template to a single entry of type “recipe”, name the template file single-recipe.blade.php, archive the entities archive-recipe.blade.php, etc.
4. I don’t want to use the blade template engine
You can use PHP code in the template file without the need for blade engine components. It is enough to include this code in the @php directive.
For the correct operation of the template, remember to maintain the appropriate file structure – the code inside the while loop can be freely edited. However, remember to leave the @extends and @section directives in the template file and the @while itself, which are required.
Template code using blade:
@extends('layouts.app')

@section('content')
  @while(have_posts()) @php the_post() @endphp
    {{-- You can edit the code below, this is a basic code for page templates in astratic theme --}}

    <article {!! post_class('page --custom-template article') !!}>
      <div class="wrapper">
        @if ($has_page_title)
          <header class="article__header">
            <h1>
              {!! $page_title !!}
            </h1>
          </header>
        @endif

        <div class="article__main --fullwidth @if (!$has_page_title) --header-off @endif">
          @php the_content() @endphp
        </div>
      </div>
    </article>

    {{-- You can edit the code above --}}
  @endwhile
@endsection
Template code using php:
@extends('layouts.app')

@section('content')
  @while(have_posts()) @php the_post() @endphp
    {{-- You can edit the code below, this is a basic code for page templates in astratic theme --}}

    <article <?php post_class('page --custom-template article') ?>>
      <div class="wrapper">
        <?php if ($has_page_title) : ?>
          <header class="article__header">
            <h1>
              <?php echo $page_title ?>
            </h1>
          </header>
        <?php endif; ?>

        <div class="article__main --fullwidth <?php (!$has_page_title) ? '--header-off' : '' ?>">
          <?php the_content() ?>
        </div>
      </div>
    </article>

    {{-- You can edit the code above --}}
  @endwhile
@endsection
You can also add PHP code only in selected places using the @php directive:
@extends('layouts.app')

@section('content')
  @while(have_posts()) @php the_post() @endphp
    {{-- You can edit the code below, this is a basic code for page templates in astratic theme --}}

    <article {!! post_class('page --custom-template article') !!}>
      <div class="wrapper">
        @if ($has_page_title)
          <header class="article__header">
            <h1>
              {!! $page_title !!}
            </h1>
          </header>
        @endif

        @php
          $array = array('one', 'two', 'three');
          foreach ( $array as $value ) :
        @endphp
          <p>@php echo $value @endphp</p>
        @php
          endforeach;
        @endphp

        <div class="article__main --fullwidth @if (!$has_page_title) --header-off @endif">
          @php the_content() @endphp
        </div>
      </div>
    </article>

    {{-- You can edit the code above --}}
  @endwhile
@endsection
5. Create your own template parts
Template partials can be attached to page templates, such as header, footer, sidebar, etc.
To create your own template part, create a file in themes / astratic-child / resources / views / partials with blade.php extension.
You can use an existing, sample file from the theme – example-content.blade.php, by copying it and renaming it.
For example, by creating a component template that includes references, you can create a file named testimonials.blade.php. A section can be attached to a page template using the @include directive as follows:
@include('partials/testimonials')Passing variables to the template part
Blade templates allow you to pass variable templates to some parts, which makes it easier to build reusable page components that may appear on one page many times, but with different data.
A template variable can be passed by using the second parameter (an array) to the @include directive:
@include('partials/testimonials', [ 'testimonials' => ['Good', 'Better', 'The Best'] ])
This way, in the testimonials.blade.php template, the $testimonials variable will be available, containing the reference table.